
Quick Answer
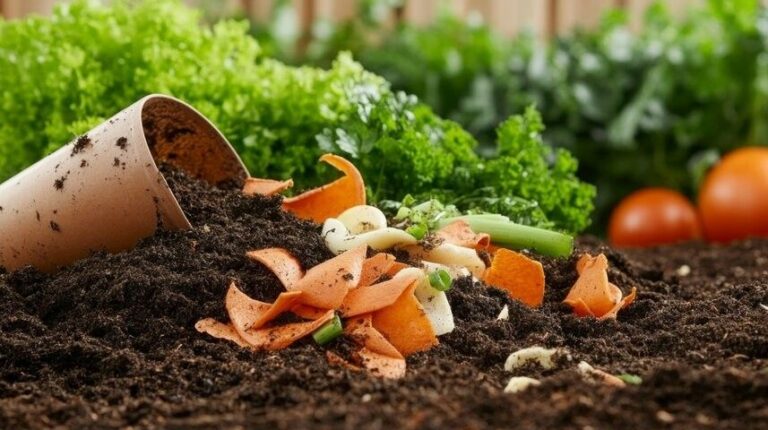
To create compost at home, alternate layers of "greens" (nitrogen-rich materials like fruit and vegetable scraps, coffee grounds, and fresh grass clippings) with "browns" (carbon-rich materials such as dry leaves, shredded cardboard, and paper) in roughly a 1:2 to 1:3 ratio. Keep the pile as moist as a wrung-out sponge and turn it every 1–2 weeks to improve airflow and speed decomposition. Under good conditions, most homemade compost is ready to use within 2–6 months.
Key Takeaways
- Composting at home transforms kitchen scraps and yard waste into nutrient-rich compost by balancing "greens" (nitrogen-rich materials) with "browns" (carbon-rich materials).
- There are six popular composting methods compost pile, compost bin, tumbler, vermicomposting, bokashi, and trench composting, each suitable for different spaces, budgets, and lifestyles.
- Aim for a 2–3:1 ratio of browns to greens, and avoid adding meat, dairy, oily foods, pet waste, or diseased plants to keep your compost healthy and odor-free.
- Composting can take anywhere from 4 weeks to 12 months, depending on the method, temperature, moisture, and how often the pile is turned.
- Finished compost should be dark, crumbly, and earthy-smelling. Use it to enrich raised beds, vegetable gardens, flower borders, containers, or as a nutrient-rich topdressing for healthy soil.
Introduction
Learning how to compost at home is one of the easiest ways to cut down on kitchen waste while producing free, nutrient-rich material for your garden. Whether you have a big backyard or just a small kitchen counter, there’s a composting method that fits your space – from simple outdoor piles to indoor worm bins. This guide walks through every method, what to compost (and what to avoid), step-by-step setup instructions, and how to troubleshoot the most common problems, so you can start composting with confidence today.
What Is Composting and Why It Matters?
Composting is an effective and natural way to recycle organic materials-like food scraps, yard waste, and plant matter-transforming them into rich, dark humus that enhances soil quality. Composting cuts landfill waste and enriches your garden while promoting healthy plant growth. Embrace composting and turn your kitchen and yard waste into a valuable resource! Microorganisms, worms, and insects do the actual work, feeding on the material and breaking it into simpler compounds over time.
Why it’s worth doing:
- Reduces household waste. Food scraps and yard waste account for a substantial portion of landfill waste. By composting, we can effectively divert this material and transform it into a valuable resource.
- Improves soil structure. Finished compost helps sandy soil hold water and helps heavy clay soil drain better. If reducing water use is a priority in your garden, pairing compost with water-wise gardening practices can significantly cut down on how often you need to water.
- Feeds your plants naturally. Compost adds nutrients gradually, without the risk of chemical burn that comes with synthetic fertilizers.
- Supports beneficial soil life. Compost introduces microbes and organisms that keep soil biologically active and healthy.
- Saves money. A steady supply of homemade compost means less spending on bagged soil amendments and fertilizer.
Types of Composting Methods
Not all composting looks the same. The right method for you depends on how much space you have, how quickly you want results, and how hands-on you want to be.
| Method | Best For | Time to Finished Compost | Effort Level | Smell Risk |
|---|---|---|---|---|
| Backyard Pile | Large yards with plenty of yard waste | 6–12 months | Low | Low (if managed properly) |
| Compost Bin | Small to medium-sized yards | 3–6 months | Low to Medium | Low |
| Tumbler Composter | Small spaces and faster composting | 4–8 weeks | Medium (regular turning) | Very Low |
| Vermicomposting (Worm Bin) | Apartments and indoor spaces | 2–3 months | Medium | Very Low (with proper care) |
| Bokashi Composting | Kitchen scraps, including meat and dairy | 2–4 weeks (fermentation) + burial time | Medium | Low (sealed system) |
| Trench Composting | Garden beds with no compost bin required | 2–6 months | Low | None (waste is buried) |
Backyard pile composting is the simplest and cheapest option – just a designated pile in a corner of the yard. It takes longer and requires more space, but needs almost no equipment.
Bin composting contains the material better than an open pile, keeps pests out more effectively, and looks tidier.
Tumbler composters speed up the process significantly because turning the drum aerates the material easily and consistently, which is often the biggest bottleneck in traditional piles.
Vermicomposting uses red wiggler worms to break down food scraps indoors or in tight spaces, making it a strong option for apartment dwellers or anyone without a yard.
Bokashi is a fermentation-based method that can handle meat, dairy, and oily foods that other methods can’t, though the fermented material still needs to be buried or added to a traditional compost pile to fully break down.
Trench composting involves burying scraps directly in the garden, letting them decompose in place and feed the surrounding soil without any bin at all.
What You Can and Can't Compost?
Successful composting comes down to balancing two categories of material: greens (nitrogen-rich) and browns (carbon-rich).
Greens (Nitrogen-rich)
- Fruit and vegetable scraps
- Coffee grounds and filters
- Tea bags (paper only, no plastic)
- Fresh grass clippings
- Eggshells (crushed)
Browns (Carbon-rich)
- Dry leaves
- Cardboard and paper (uncoated)
- Straw and hay
- Wood chips and sawdust (untreated wood only)
- Dried plant stalks
Aim for a ratio of roughly 2 to 3 parts browns for every 1 part greens. Too many greens creates a wet, smelly pile; too many browns slows decomposition to a crawl.
Pro Tip: Keep a bag of dry leaves or shredded cardboard near your compost bin year-round, even outside of fall. Every time you add wet kitchen scraps, toss in a handful of dry browns at the same time – this “instant ratio fix” habit prevents the wet, smelly pile problem before it ever starts.
What to avoid composting
- Meat, bones, and fish scraps (attract pests, slow to break down)
- Dairy products (same issue – smell and pests)
- Oily or greasy foods
- Diseased plants (can spread pathogens back into your garden)
- Weeds that have gone to seed (they may survive and sprout in your beds later)
- Pet waste from cats or dogs (can carry harmful pathogens)
- Treated or painted wood
- Glossy or coated paper
Pro Tip
Keep a bag of dry leaves or shredded cardboard next to your compost bin throughout the year—not just during fall. Every time you add wet kitchen scraps, immediately mix in a handful of dry "browns". This simple "instant ratio fix" keeps the carbon-to-nitrogen balance in check, improves airflow, and prevents your compost pile from becoming wet, compacted, and smelly before problems start.
How to Start a Compost Pile Step by Step ?
- Choose your method and location. Pick a spot with good drainage, partial sun (full shade slows decomposition, full sun can dry the pile out too fast), and easy access – you’ll be visiting it every few days.
- Start with a coarse base layer. Add 3-4 inches of twigs, straw, or small branches at the bottom. This creates airflow underneath the pile and prevents the base from turning into a soggy mat.
- Layer browns and greens. Alternate roughly 4-6 inch layers, aiming for that 2-3:1 brown-to-green ratio by volume, not weight – browns are lighter, so it takes more of them by volume than you’d expect.
- Add water as you go. Aim for the consistency of a wrung-out sponge – damp enough to clump slightly when squeezed, but with no water dripping out. Too wet and it’ll smell; too dry and it won’t break down.
- Turn the pile every 1-2 weeks. Use a garden fork or compost aerator to move outer material into the center – this adds oxygen, which speeds decomposition and prevents odor buildup.
- Keep adding material over time. Composting is ongoing -mix new scraps into the center of the pile (not just piled on top) so they connect with the active, warmer material where breakdown happens fastest.
- Be patient and check progress every few weeks. Depending on your method, expect anywhere from 4 weeks (tumbler) to several months (cold pile) before it’s fully broken down – look for the “ready” signs in Section 7 rather than guessing by date alone.
How Long Does Composting Take?
Timelines vary significantly by method and how actively you manage the pile. Here’s a realistic breakdown by method:
| Method | Typical Timeline | Why |
|---|---|---|
| Tumbler Composting | 4–8 weeks | Frequent turning and the enclosed design retain heat, allowing organic materials to break down much faster. |
| Hot Composting (Actively Managed Pile) | 6–8 weeks | A large pile (at least 3 × 3 ft) and regular turning generate high internal temperatures that accelerate decomposition. |
| Cold Composting (Passive Pile) | 6–12 months | Minimal maintenance and little or no turning result in slower microbial activity and lower heat production. |
| Vermicomposting | 2–3 months | Composting worms process food scraps continuously, with speed depending on feeding rates and worm population. |
| Bokashi Composting | 2–4 weeks to ferment + 2–4 weeks after burial | The sealed fermentation stage is quick, but the pre-compost must still decompose fully once buried in the soil. |
| Trench Composting | 2–6 months | Decomposition depends on soil temperature, moisture, and the type of material buried. Soft kitchen scraps decompose much faster than woody debris. |
The 4 factors that actually control your timeline
- Turning frequency. Turning introduces oxygen, which feeds the aerobic microbes doing the actual decomposition. A pile turned weekly can finish in half the time of one left untouched.
- Greens-to-browns balance. An unbalanced pile (too many browns) can stall for months with barely any visible change, since there isn’t enough nitrogen to fuel microbial activity.
- Moisture level. Both too wet and too dry piles slow down dramatically – decomposition happens fastest when material stays consistently damp, like a wrung-out sponge.
- Temperature and season. Microbial activity slows significantly below 50°F (10°C) and speeds up in warm weather. A pile that takes 3 months in summer might take twice as long over winter.
How to speed up composting
If you want faster results, the highest-impact changes are: chop or shred material into smaller pieces before adding it, turn the pile more often (every 3-4 days instead of every 1-2 weeks), and keep the pile size around 3x3x3 feet – big enough to hold heat, but not so large it’s hard to turn.
Pro Tip: Location matters more than most people realize – a pile in full winter shade can take noticeably longer to break down than one getting a few hours of sun, simply because ambient warmth speeds up microbial activity.
Troubleshooting Common Compost Problems
My compost smells bad
Usually caused by too many greens, not enough airflow, or a pile that’s too wet. Add dry browns like shredded cardboard or leaves, and turn the pile to introduce oxygen.
My compost isn’t breaking down
This is often a sign the pile is too dry, too small, or too heavy on browns. Add water, add more greens, and make sure the pile has enough volume (at least 3×3 feet is ideal for consistent heat retention).
Pro Tip: Chop or shred larger scraps (like whole banana peels, corn cobs, or thick cardboard) before adding them. Smaller pieces break down significantly faster because microbes have more surface area to work with – this alone can cut weeks off your composting time.
My compost is too wet
Incorporate dry, absorbent browns like straw or shredded paper into your compost pile. Turning the pile more frequently will enhance drying and aeration, leading to healthier compost.
My compost is too dry
Add water gradually while turning, aiming for a moisture level similar to a damp sponge.
Pests or rodents are getting into my pile
Avoid adding meat, dairy, or oily foods. Bury fresh scraps under a layer of browns instead of leaving them exposed on top, and consider switching to an enclosed bin or tumbler if the problem continues.
My compost is attracting flies
Fruit flies are usually drawn to exposed fruit scraps. Bury new additions under browns each time, and keep the pile turned regularly.
How to Know When Compost Is Ready
Finished compost should check all four of these boxes:
- Dark brown to black in color – similar to rich, dark potting soil
- Crumbly, soil-like texture – you shouldn’t be able to identify the original scraps; everything should have broken down into small, uniform particles
- Earthy smell – like fresh forest soil, not sour, ammonia-like, or rotten
- Cool to the touch – active piles generate internal heat as microbes work; finished compost has cooled back down to roughly outdoor temperature
- Reduced volume – a finished pile is typically about half the size of what you originally added, since the material has broken down and compacted
If you can still identify individual food scraps, see visible bits of leaves or twigs, or the pile still smells strongly, it needs more time.
The simple “bag test”
If you’re not sure, seal a handful of your compost in a plastic bag for 2-3 days. If it smells sour or like ammonia when you open it, it’s not fully finished – unfinished compost can still be releasing gases as it breaks down, which can stress young plant roots if used too early. If it still smells earthy, it’s ready to use.
What happens if you use compost too early
Compost that isn’t fully finished can temporarily rob nitrogen from the soil as it continues to break down, which may slow plant growth rather than help it. It can also still contain seeds or pathogens that haven’t been neutralized by heat. If you’re not sure, it’s safer to let it cure for another few weeks than to risk stunting new plantings.
If your compost seems “stuck” between finished and unfinished
It’s common for compost to look mostly done but still have a few unbroken pieces – twigs, corn cobs, or avocado pits are the usual culprits. You don’t need to wait on these: simply sift the compost through a garden sieve or mesh screen, use the fine material that passes through, and toss the larger leftover pieces back into a new pile to keep breaking down.
Pro Tip
Finished compost should feel light, loose, and crumbly when you scoop up a handful - not heavy, sticky, or clay-like. If it forms a dense, wet ball when squeezed, let it cure for a few more weeks or mix in additional dry browns, such as shredded leaves or cardboard, before using it in your garden. Properly cured compost improves soil structure without compacting your beds.
How to Use Finished Compost in Your Garden
Once your compost is ready, there are several ways to put it to work:
- Mix it into raised garden beds to boost nutrient content and improve soil structure. If you’re setting up a new bed, our guide on the best soil for raised garden beds breaks down exactly how much compost to blend in for the best results.
- Top-dress existing beds by spreading an inch or two of compost over the soil surface each season.
- Use it as a low-cost filler when building new raised beds – pairing it with other budget-friendly materials, as covered in our guide on how to fill a raised garden bed cheaply.
- Make compost tea by steeping finished compost in water to create a liquid feed for container plants.
For more ways to help your plants thrive faster, check out our expert-backed gardening tips for 2026.
Pro Tip
Don't wait for a perfectly finished batch of compost before putting it to work. Compost that's slightly chunky but no longer contains recognizable food scraps can be mixed into garden beds a few weeks before planting. It will continue decomposing in the soil while improving soil structure, increasing organic matter, and supporting beneficial microbes before your crops begin to grow.
Composting Myths Debunked
A lot of hesitation around composting comes from myths that aren’t true in practice. Here’s what’s actually accurate, based on how home composting really behaves:
Myth: Compost always smells bad. A properly balanced pile smells earthy, like fresh soil – not rotten or sour. Bad odor almost always means too many wet greens, not enough browns, or a pile that needs turning, not that composting itself is inherently smelly.
Myth: You need a big backyard to compost. Vermicomposting with worm bins, bokashi, and small tumblers is perfectly suited for balconies, garages, or even under kitchen sinks. The key factor in choosing a method is the available space, ensuring that composting is always a viable option.
Myth: Composting attracts rats and pests no matter what. Pests are drawn to specific mistakes – exposed meat, dairy, or oily food scraps left uncovered. Burying fresh scraps under browns and using an enclosed bin largely eliminates this risk, even in urban or suburban yards.
Myth: You need fancy equipment to start. A pile in the corner of a yard, a repurposed storage tote with drilled holes, or a simple wire cylinder all work as well as a store-bought bin. Equipment adds convenience, not a requirement.
Myth: Composting is a slow, months-long process no matter what you do. Timeline depends heavily on method and maintenance. A well-managed tumbler or hot pile that’s turned regularly can finish in 4-8 weeks – it’s neglect, not composting itself, that stretches things out to 6-12 months.
Myth: You can’t compost in winter. Decomposition slows in the cold, but it doesn’t stop entirely, and insulated bins or larger piles retain enough heat to stay active even through freezing temperatures. Keep adding material through winter so the pile is ready to go once things warm up.
Pro Tip
If your compost pile slows down during cold weather, don't worry and avoid adding extra water. Cold, soggy compost breaks down even more slowly because microbial activity decreases in low temperatures. Instead, add a layer of dry browns, such as shredded leaves or straw, over the top to provide insulation and absorb excess moisture. As temperatures warm up, the composting process will naturally become active again.
Composting FAQs
Can you compost in winter?
Yes, decomposition slows down in cold temperatures, but you should continue adding material throughout the winter. The pile will reactivate and begin decomposing again as temperatures rise in the spring.
Does composting attract pests?
It can, if meat, dairy, or oily foods are added, or if fresh scraps are left exposed on top of the pile. Burying scraps under browns and avoiding restricted items greatly reduces this risk.
Do you need a special bin to compost?
No. A simple designated pile works fine, though a bin or tumbler keeps things tidier, contains odor better, and can speed up the process.
How often should you turn compost?
Every 1–2 weeks for most methods. Tumbler composters can be turned every few days since they’re designed for frequent aeration.
Can you compost citrus, onions, or garlic?
Yes, in moderation. Large amounts can slow decomposition and may affect the population of beneficial worms in vermicomposting systems, so add them sparingly.
Is composting smelly?
A properly balanced, well-maintained pile should smell earthy, not foul. Bad odor is almost always a sign the greens-to-browns ratio or moisture level needs adjusting.
Can you compost eggshells?
Yes – crush them first to help them break down faster and add a source of calcium to the finished compost.
How do you start a compost bucket for kitchen scraps?
Use a small lidded container (with or without a charcoal filter) to collect food scraps in the kitchen, then empty it into your main outdoor pile, bin, or tumbler every few days. This keeps scraps from sitting out and makes it easy to compost daily without walking outside each time.
How do you make a compost bin at home?
A simple DIY bin can be built from a plastic storage tote, a wooden pallet frame, or a wire mesh cylinder. Drill or cut ventilation holes in the sides for airflow, add drainage at the bottom if using a sealed container, and follow the same greens-and-browns layering method as a standard pile.
Can you make compost in 7 days?
Not fully – even fast, actively managed hot compost typically takes 4 to 8 weeks at minimum. Some “quick compost” methods can produce a rough, partially broken-down material in 1-2 weeks. Still, it won’t have the fully finished, stable texture of properly cured compost.
What’s the best compost bin for beginners?
A simple enclosed bin or tumbler is easiest for beginners, since it contains odor, keeps pests out, and requires less manual turning than an open pile. Tumblers are especially beginner-friendly because rotating the drum is simpler than turning a pile with a pitchfork.
How do you compost with a tumbler?
For optimal results with your drum compost, confidently add a mix of greens and browns. Keep the material damp, like a wrung-out sponge, and be diligent about rotating the tumbler every 2-3 days to ensure proper aeration. You’ll find that tumbler compost is ready in just 4 to 8 weeks, making it one of the fastest and most effective home composting methods available.
Conclusion
Composting at home is one of the simplest changes you can make as a gardener – it cuts down on kitchen waste, saves money on soil amendments, and gives your plants a steady supply of natural nutrients. Whether you start with a basic backyard pile or a compact indoor worm bin, the core principles stay the same: balance your greens and browns, manage moisture, and give the pile enough air to break down properly.
Once you’ve got finished compost ready to use, put it to work – mix it into a new raised bed setup, blend it with the best soil for raised garden beds, or use it alongside other budget-friendly options in our guide on how to fill a raised garden bed cheaply. And if pests start showing up once your compost is in the ground, check out our guide to natural pest control for vegetable gardens to keep your beds healthy.
Ready to put your compost to good use?
Explore more raised bed and soil guides on Daily Garden Guide to build a healthier, more productive garden from the ground up.
About The Author

Mamta Sahney
Mamta Sahney is the founder of Daily Garden Guide and a content strategist specializing in research-driven gardening and home living content. She creates practical guides on raised bed gardening, plant care, pest control, landscaping, and seasonal gardening, helping home gardeners make informed decisions with clear, reliable advice.